Sencha Web Application Client is available from the Apple iTunes App Store.
Sencha Web Application Client enables you to view available apps and quickly move between the apps in Sencha Web Application Client.
This guide describes how to use Sencha Web Application Client with iOS devices. For use with Android devices, see the Android Sencha Web Application Client guide.
This guide assumes you have received an organization name and password from your Sencha Web Application Manager administrator.
Requirements
Sencha Web Application Client supports iOS version 6.0 and later.
Installing the user client requires 5 MB to download to the device, with the installed size requiring approximately 35 MB on the device. Use of Sencha Web Application Client requires access to the Internet.
Install iOS Sencha Web Application Client
Note: Even though the Sencha app is free, iTunes requires that you have an Apple ID, which requires that you supply a credit card or PayPal information.
To install:
Click the App Store icon on your device.
Search for sencha. Click the cloud icon to install Sencha Web Application Client.
Enter your AppleID password.
Click OK to indicate that you are 17 years old or older - this prompt is required by Apple for apps that provide web view access.
Click Open to launch Sencha Web Application Client.
Log Into Sencha Web Application Client
To log in:
Type the name of your organization and click Next.
Supply your username and password provided by your Sencha Web Application Manager administrator, and click Next. If needed, click the Back arrow to return to the previous screen. If you can’t remember your password,click the question mark. Resetting your password requires access to a mail program to receive instructions.
If prompted, specify a personal identification number (PIN).If a numeric keypad appears, enter a PIN consisting of at least 4 numbers.If a QWERTY keyboard displays, enter text consisting of at least 4 characters, or a mix of characters, numbers, and special characters. The minimum length and allowable characters for a PIN are set by your Sencha Web Application Manager administrator.
Reset Your Password
To reset your password:
Click the question mark icon.
Enter your email address and click Reset Password. Resetting your password requires access to a mail program to receive instructions.
Information about how to reset your password is sent to the email address you provide. To return to the previous screen, click the left arrow.
Return PIN Prompt
After you start a Sencha Web Application Client session, you can exit by pressing the Home key on your device. When you return to Sencha Web Application Client, you may be prompted for the organization and/or for the PIN that was previously set.
Add an Organization
You can specify the name of another organization. An organization name can be a project name, company name, institution name, etc. Your Sencha Web Application Manager administrator provides you with the organization name.
Click Organization, type the name, and click Next. To return to the previous screen, click the left arrow.
Sencha Web Application Client Controls
The controls for Sencha Web Application Client are at the top of each app window as in this example:
- Apps - View available apps.
Controls:
- Star - Add app to Favorites
- Left Arrow - Previous history item
- Windows - Show tab view
- Right Arrow - Next history item
- Round Arrow - Refresh view of app
Access Another App
You can access another app by clicking the circle icon at the left of an app’s top bar.
To access apps or options:
- Choose an app.
- Click the Sencha icon to view Settings.
- Click the previous app’s window to return to that app.
- Click Switch Organization to log in with a new organization name.
Refreshing Apps
To get the latest versions of the apps from the app server, navigate to the app list and swipe down to refresh the apps.
Settings
Sencha Web Application Client provides the following settings:
Close - Return to previous screen
Push Notifications - Allows you to set permissions specifying whether applications may send you alerts and/or badge notifications.
Change PIN - Specify your current PIN, a new PIN, and confirm the new PIN
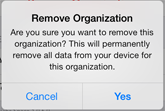
Remove Organization - Deletes all data you may have stored while using the current organization and prompts you to log in again with a new organization name. Use this option if you’ve borrowed a device and want to return it, or when you’re changing organizations. A confirmation prompt displays to be sure you want to delete all your app data:
Legal - View Sencha Web Application Client attribution copyright information and terms of service
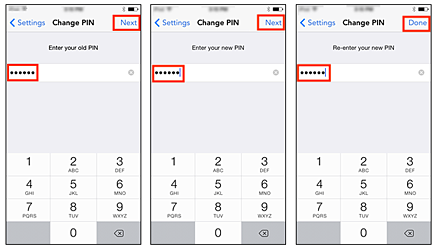
Change PIN
Specify your PIN and new PIN, and click Next. Confirm the new PIN and click Done.