Sencha Web Application Manager allows developers to deploy applications using two different methods.
URL Deployment
The URL deployment model allows developers to simply add the URL of the application to the Sencha Web Application Management Console. This allows users to instantly access existing application without any extra effort on the developer’s part. This is a great option for 3rd-party SAAS applications or existing applications that are already deployed to a web-server. However, the URL deployment model makes it difficult to support off-line applications.
Console Deployment
Sencha Web Application Manager supports a new deployment model that allows applications to be pushed directly to Sencha Web Application Clients that have access to them.
From the Sencha Web Application Management Console, Sencha Cmd, or via the Sencha Web Application Manager Admin API, a developer can
- Package an application
- Create a version of that application in Sencha Web Application Manager
- Deploy a version to all users who have access to that application
When an application is deployed, the Sencha Web Application Manager server determines all of the devices that have access to that application. It will then send push notifications to each device informing it of the new application version. Sencha Web Application Client will download the application archive the next time it is launched. Each time the user accesses the application, the contents of the application will be served from Sencha Web Application Client. No network connection is required.
Application Versions
An application can have any number of versions, but only one can be deployed at a time. It is possible to rollback to older versions of an application simply by deploying the desired version.
The archive deployment model provides significant flexibility and agility for application management. Application updates can be managed in real-time and on your schedule.
Note: Archive application deployment is currently supported on Android and iOS clients. Application development via Windows Phone and Desktop clients will be released at a later date.
Optimize Application for Deployment:
Application data is transmitted via archive files and decompressing files takes time. The larger your app, the longer it will take. Here are some tips on reducing your application’s footprint.
- Sencha Web Application Manager makes it easy to deploy multiple applications and connect them with the Invoke API. Instead of deploying one large application, deploy several smaller ones.
- Do not include large datasets or large binary files in application archive. Instead, use the download API and secure storage API to download necessary application content. By delivering data in this manner, you reduce application size and allow data to persist between version upgrades.
- Requests to local resources should not include query parameters or other cache busting workarounds. Utilizing these sorts of workarounds will cause the appended parameters to be interpreted as part of the file name.
Prepare Application Archive
Build your application using whatever build tool(s) you use to prepare your application for production.
Create an archive of the built application. Sencha Web Application Client will look for an index.html file, so ensure it exists in the root of the application archive folder. The user will receive an error if an
index.htmlfile is not present. All major archive file formats are supported: .zip, .7z, .rar, .tar.gz, .tgz, .bz2.Use one of the following options to upload the Archive to the Sencha Web Application Manager server and create a new version.
Management Console
The Sencha Web Application Manager console can be used to view and manage application versions in Sencha Web Application Manager.
The Application Panel now displays the version of each deployed.
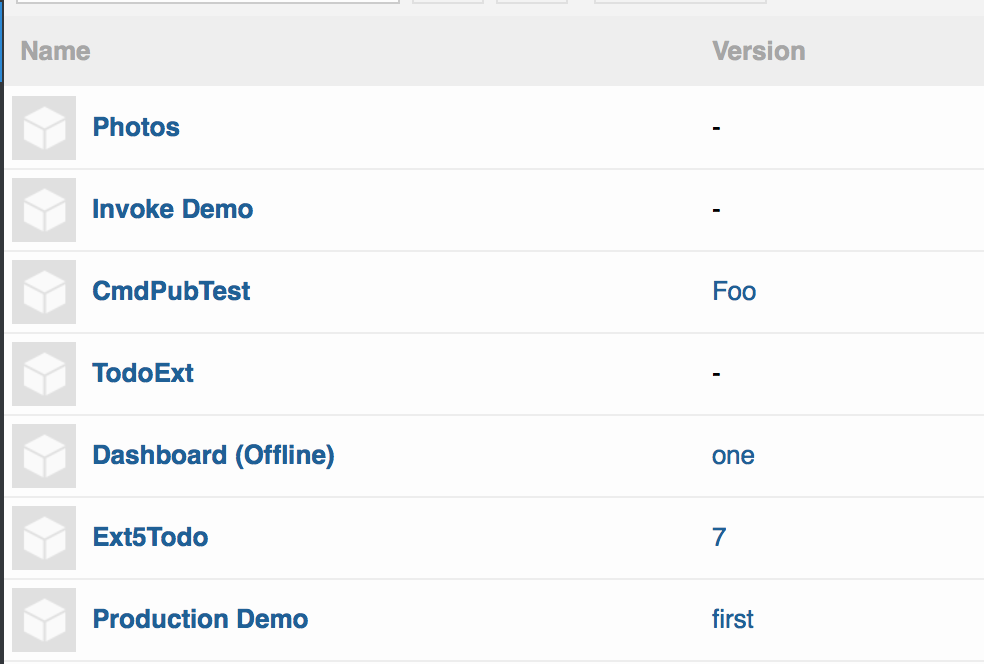
The Application detail panel includes a versions tab that displays all versions of an application.

Creating a New Application Version
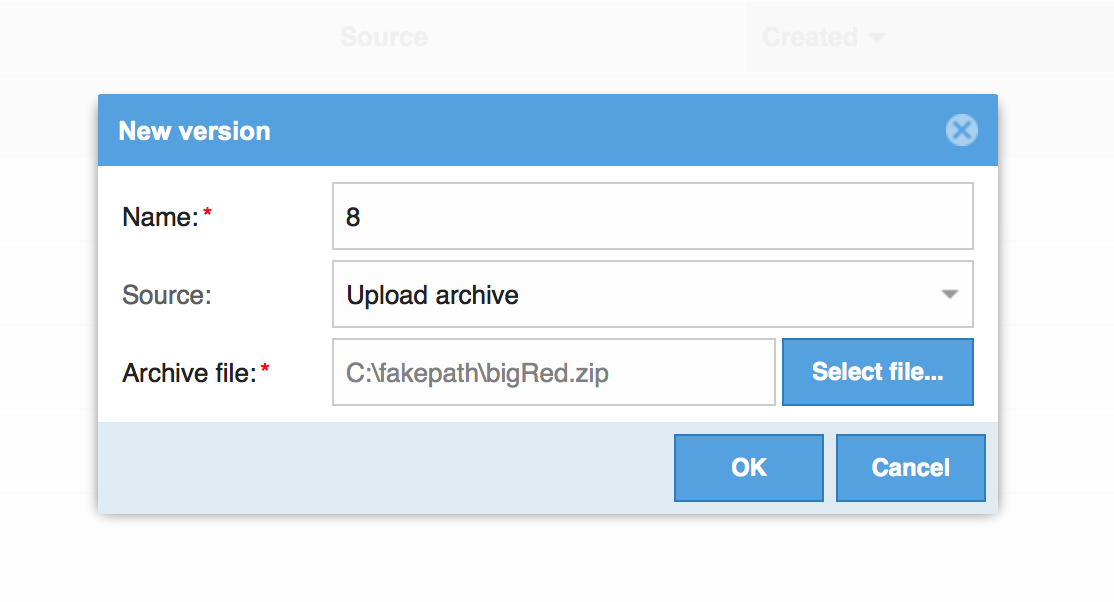
- Click the “Create” button to create a new version of your application.
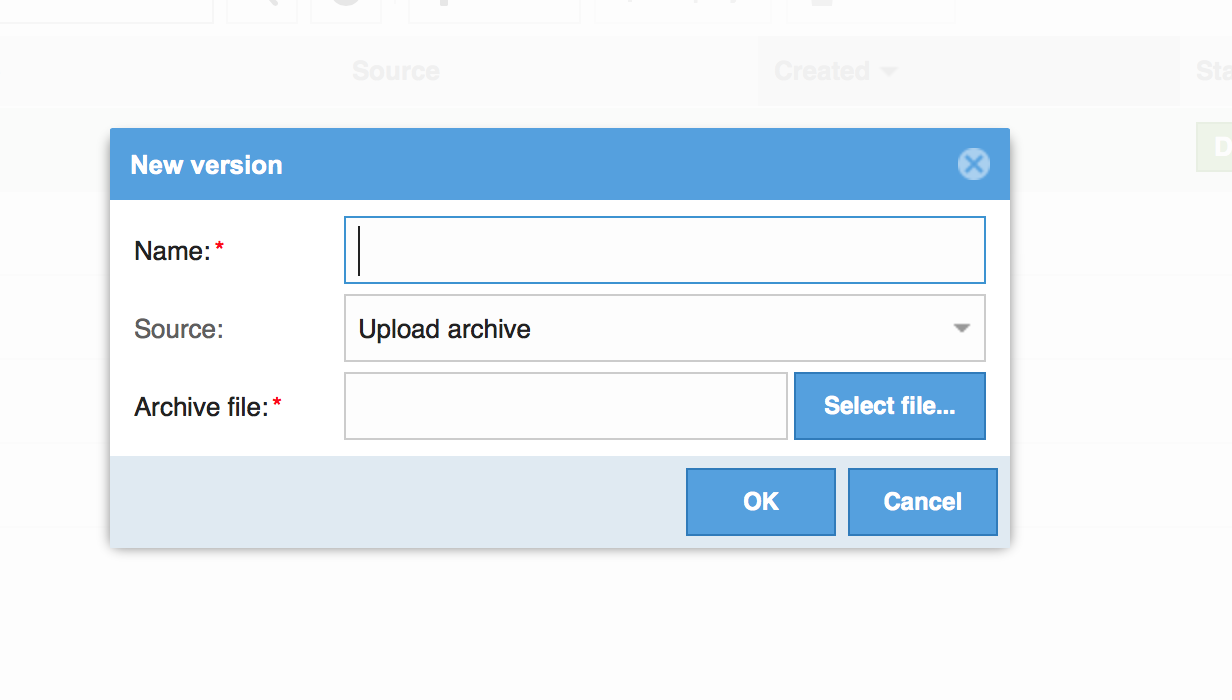
Give the version a name. The name can be any string, but should be unique to your application and meaningful to your users.
Select “Upload archive” from the source drop-down to deploy an archive of the app via the Sencha Web Application Manager server.
Note: The process of uploading the archive then having the Sencha Web Application Manager optimize the archive can take several minutes depending on the size of the archive.
Deploy that version to your users by selecting the version from the list and clicking the “deploy” button at the top of the panel.
Confirm the deployment.
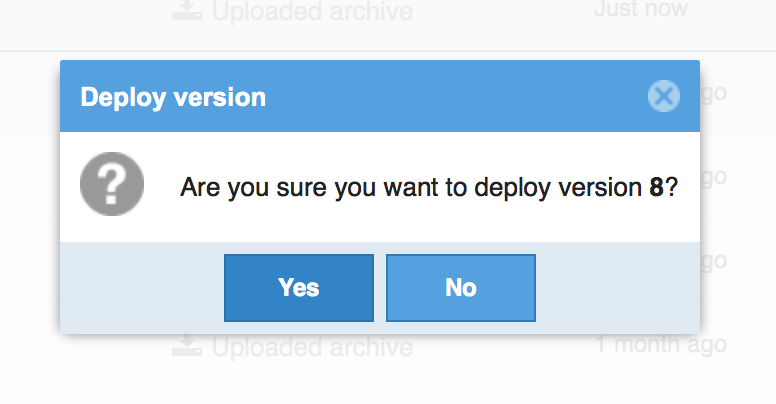
Once confirmed, users with access to the application will be notified of a new version.
Command Line Tool
The latest version of Sencha Cmd now supports deploying directly to Sencha Web Application Manager. You will need to have Sencha Cmd version 5.1.2 or greater installed to have access to the new commands.
Generate an API key to submit the app to the Sencha Web Application Manager server.
Create an API key and secret via the Sencha Web Application Manager admin console. Check out Admin API Intro for more details.
Find the ID of the application you are going to update.
The ID can be found in the URL of the overview panel in the management console: https://manage.sencha.com/#apps/123456/overview The ID is 123456
The ID can also be found using the Admin API.
- Update your application’s
app.json.
Add a manager object and include your app id, API key, and secret:
"manager": {
      // The Sencha Web Application Manager ID for this application
      "id": 12345,
      // The default Sencha Web Application Manager host.
      "host": "https://api.space.sencha.com/json.rpc",
      // These may be specified here, but are best specified in your user
      // ~/.sencha/cmd/sencha.cfg file
      "apiKey": "",
      "secret": ""
}
Note: You may also want to modify the version property in app.json as that will be used for the name of the version.
- Save the changes.
Sencha Cmd will automatically archive the application in the build directory.
Run the publish command.
sencha app publish production
If you are using a different build target change production to whatever build environment you have built.
to specify the version name when publishing and override the app.json version:
sencha config -prop app.version=<version> then app publishNow that the new version is created, you can deploy the application directly from Cmd or you can login the Management Console and deploy the application from there.
Admin API
If you have a Continuous Integration server, or other automated build process, the Admin API is a great way to integrate Sencha Web Application Manager into your deployment process. New application versions can be created and deployed automatically. If you haven’t used the Admin API, check out our getting started guide. Once you are able to make Admin API calls, the Version Service API methods will allow you to manage application versions.
If you are using Sencha Web Application Manager to test your applications, the build server can push new versions of the application to the devices being used by your quality assurance team.
Production deployment can be fully automated using Sencha Web Application Manager’s Admin API.