One of the most important pieces of utilizing third party software is the ability to easily modify the aesthetics to match your branding. Sencha Web Application Manager gives administrators the ability to do just that.
The customize section of Sencha Web Application Manager’s settings allows administrators to make modifications to the general “look and feel” of your organization’s Sencha Web Application Client UI and PIN Screen.
Note: Changes to the Client’s UI are applied the next time the user accesses the org. The simplest way to test your changes is to choose ‘switch organization’ form the application menu then re-select the org from the org list screen.
Let’s walk through a few of the basic pieces of customizable content.
Finding Customize
You can navigate directly to the customization settings: https://manage.sencha.com/#settings/customize
Note: If your session has expired, you will be presented with the login form and finally redirected to this URL after you complete login.
At this point, you’ll need to check the state of “Customize”. It may be disabled by default. Modify this value by clicking the “Enable” button found to the far right.
Now you’re ready to modify the look and feel of your organization’s Sencha Web Application Client implementation.
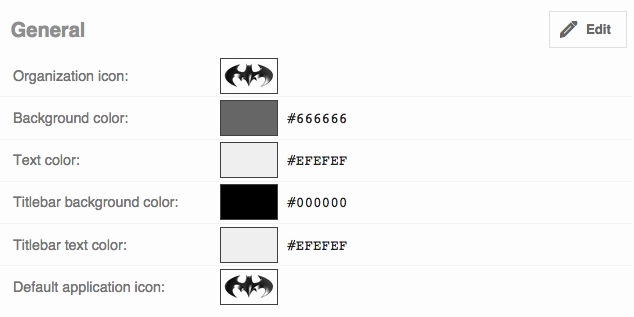
General Settings
The “General” settings allow you to modify the main iconography and color scheme of your Sencha Web Application Client implementation. Customizable settings include:
- Organization Icon - The icon displayed in the top left corner of the main menu viewport
- Background Color - The background color of the main menu viewport
- Text Color - The text color used in the main menu viewport
- Title Bar Background Color - The application browser’s title bar color
- Title Bar Text Color - The application browser’s text color
- Default Application Icon - The icon found to the left of every application. This icon will not be applied if an application has a specific icon set.
You can see an example of a “General” image and color scheme from the Manager’s view in the image below.
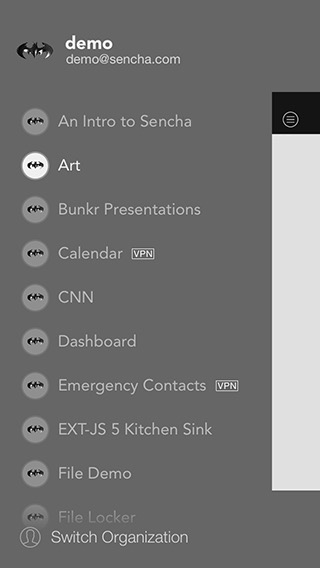
And now you can see the resulting Sencha Web Application Client application.
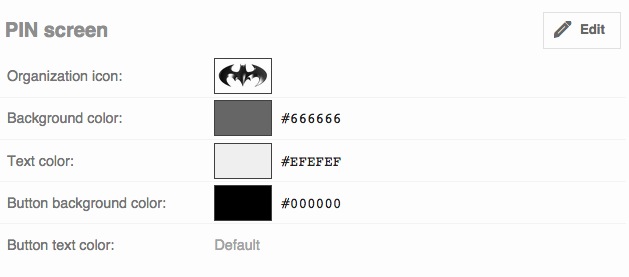
PIN Screen Settings
The “PIN Screen” settings allow you to modify the iconography and color scheme of your Sencha Web Application Client implementation’s PIN Sign-on Screen. Customizable settings include:
- Organization Icon - The icon displayed in the top center of the PIN screen viewport
- Background Color - The background color of the PIN screen viewport
- Text Color - The text color used in the PIN screen viewport
- Button Background Color - The color of the submit button on the PIN screen
- Button Text Color - The color of the submit button text on the PIN screen
You can see an example of a possible PIN Screen color scheme from the Manager’s view in the image below.
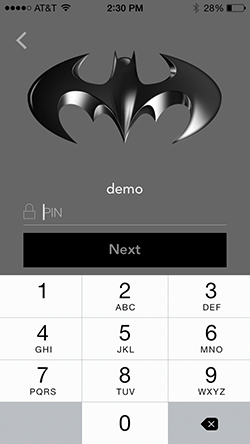
And now you can see the resulting PIN Screen color scheme.
Customization Types
Sencha Web Application Manager currently has two types of modifiers. You can modify images and adapt color. Let’s walk through one of each.
Note: The process is the same across all “types” of modifier. For example, all image changes follow the same process.
Modifying an Image
Let’s start with image modification by adding your organization’s custom icon to the application.
- Click the “Edit” button found directly to the right of “General”. You should now find all of the fields in the “General” category editable.
- Click the “Browse” button next to “Organization icon”.
- Select your Icon of choice from your local machine using your system’s file browser.
- Once you’re happy with your selection, click the “Save” button. The “Save” button can be found directly to the right of “General”.
Log in to your connected Sencha Web Application Client and you should find your newly chosen image in the top left corner of the viewport.
Note: While Sencha Web Application Manager can accept any popular image type (jpg, png, gif, etc), it will most likely be in your best interest to utilize an image with transparency (png, gif).
Modifying a Color
Lastly, let’s walk through color modification by changing your organization’s PIN Screen background color.
- Click the “Edit” button found directly to the right of “Pin Screen”. You should now find all of the fields in the “Pin Screen” category editable.
- Focus your cursor on the “Background color” text field.
- Add a valid hexadecimal color code to the field (i.e.,
#000000,#FFFFFF, etc). - Once you’re happy with your selection, click the “Save” button. The “Save” button can be found directly to the right of “General”.
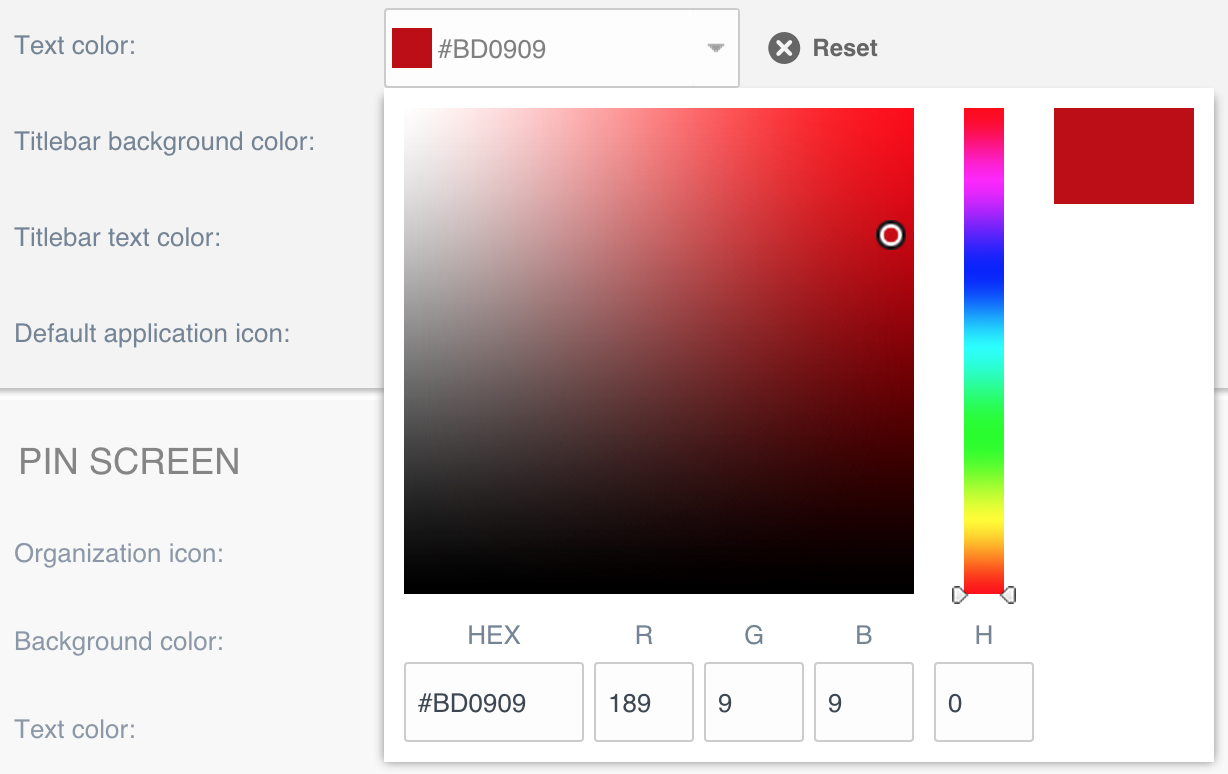
Alternatively, a color may be selected using the color picker selector by clicking the ‘down’ arrow on the desired color field:
Open your connected Sencha Web Application Client and you should find your PIN Screen background color matches your newly chosen hexadecimal color.
Resetting Your UI Customization
You may reset your modified UI at any time by clicking the “Reset” button, found in the top right portion of the Customize menu. Clicking “Reset” will return all of your modifications to their default values.