Many classes have shortcut names used when creating (instantiating) a class with a
configuration object. The shortcut name is referred to as an alias (or xtype if the
class extends Ext.Component). The alias/xtype is listed next to the class name of
applicable classes for quick reference.
Framework classes or their members may be specified as private or protected. Else,
the class / member is public. Public, protected, and private are access
descriptors used to convey how and when the class or class member should be used.
Public classes and class members are available for use by any other class or application code and may be relied upon as a stable and persistent within major product versions. Public classes and members may safely be extended via a subclass.
Protected class members are stable public members intended to be used by the
owning class or its subclasses. Protected members may safely be extended via a subclass.
Private classes and class members are used internally by the framework and are not intended to be used by application developers. Private classes and members may change or be omitted from the framework at any time without notice and should not be relied upon in application logic.
static label next to the
method name. *See Static below.Below is an example class member that we can disect to show the syntax of a class member (the lookupComponent method as viewed from the Ext.button.Button class in this case).
Let's look at each part of the member row:
lookupComponent in this example)( item ) in this example)Ext.Component in this case). This may be omitted for methods that do not
return anything other than undefined or may display as multiple possible values
separated by a forward slash / signifying that what is returned may depend on the
results of the method call (i.e. a method may return a Component if a get method calls is
successful or false if unsuccessful which would be displayed as
Ext.Component/Boolean).PROTECTED in
this example - see the Flags section below)Ext.container.Container in this example). The source
class will be displayed as a blue link if the member originates from the current class
and gray if it is inherited from an ancestor or mixed-in class.view source in the example)item : Object in the example).undefined a "Returns" section
will note the type of class or object returned and a description (Ext.Component in the
example)Available since 3.4.0 - not pictured in
the example) just after the member descriptionDefaults to: false)The API documentation uses a number of flags to further commnicate the class member's function and intent. The label may be represented by a text label, an abbreviation, or an icon.
classInstance.method1().method2().etc();false is returned from
an event handler- Indicates a framework class
- A singleton framework class. *See the singleton flag for more information
- A component-type framework class (any class within the Ext JS framework that extends Ext.Component)
- Indicates that the class, member, or guide is new in the currently viewed version
- Indicates a class member of type config
- Indicates a class member of type property
- Indicates a class member of type
method
- Indicates a class member of type event
- Indicates a class member of type
theme variable
- Indicates a class member of type
theme mixin
- Indicates that the class, member, or guide is new in the currently viewed version
Just below the class name on an API doc page is a row of buttons corresponding to the types of members owned by the current class. Each button shows a count of members by type (this count is updated as filters are applied). Clicking the button will navigate you to that member section. Hovering over the member-type button will reveal a popup menu of all members of that type for quick navigation.
Getting and setter methods that correlate to a class config option will show up in the methods section as well as in the configs section of both the API doc and the member-type menus just beneath the config they work with. The getter and setter method documentation will be found in the config row for easy reference.
Your page history is kept in localstorage and displayed (using the available real estate) just below the top title bar. By default, the only search results shown are the pages matching the product / version you're currently viewing. You can expand what is displayed by clicking on the button on the right-hand side of the history bar and choosing the "All" radio option. This will show all recent pages in the history bar for all products / versions.
Within the history config menu you will also see a listing of your recent page visits. The results are filtered by the "Current Product / Version" and "All" radio options. Clicking on the button will clear the history bar as well as the history kept in local storage.
If "All" is selected in the history config menu the checkbox option for "Show product details in the history bar" will be enabled. When checked, the product/version for each historic page will show alongside the page name in the history bar. Hovering the cursor over the page names in the history bar will also show the product/version as a tooltip.
Both API docs and guides can be searched for using the search field at the top of the page.
On API doc pages there is also a filter input field that filters the member rows
using the filter string. In addition to filtering by string you can filter the class
members by access level and inheritance. This is done using the checkboxes at the top of
the page. Note that filtering out private members also filters the API class
navigation tree.
Clicking on an empty search field will show your last 10 searches for quick navigation.
Each API doc page (with the exception of Javascript primitives pages) has a menu view of metadata relating to that class. This metadata view will have one or more of the following:
Ext.button.Button class has an alternate class name of Ext.Button). Alternate class
names are commonly maintained for backward compatibility.Runnable examples (Fiddles) are expanded on a page by default. You can collapse and expand example code blocks individually using the arrow on the top-left of the code block. You can also toggle the collapse state of all examples using the toggle button on the top-right of the page. The toggle-all state will be remembered between page loads.
Class members are collapsed on a page by default. You can expand and collapse members using the arrow icon on the left of the member row or globally using the expand / collapse all toggle button top-right.
Viewing the docs on narrower screens or browsers will result in a view optimized for a smaller form factor. The primary differences between the desktop and "mobile" view are:
The class source can be viewed by clicking on the class name at the top of an API doc page. The source for class members can be viewed by clicking on the "view source" link on the right-hand side of the member row.
Sencha provides a delivery model that allows you to install and operate Sencha Web Application Manager via your in-house server and computing infrastructure. This model utilizes your organization's native computing resources and only requires a licensed or purchased copy of Sencha Web Application Manager.
This manual provides a workflow that will guide you through the following tasks:
The on-premise version of Sencha Web Application Manager consists of 2 applications:
Sencha Web Application Manager API Server
Sencha Web Application Manager API Server runs on top of an IIS server and accepts JSON RPC requests from users. The API Installer mounts Sencha Web Application Manager Dashboard as a separate web application on your target IIS Server.
Sencha Web Application Manager Worker
Sencha Web Application Manager Worker is the on-premise service that handles complex background server tasks, such as:
Data imports
This is a high level list of tasks. Sencha Web Application Manager Worker performs many other tasks beyond the above list.
Sencha Web Application Manager API Server and Sencha Web Application Manager Worker are connected via a MSMQ Private Transactional Queue. This allows for a wide variety of system architecture solutions. You may increase the number of running workers in order to scale up your Sencha Web Application Manager Server. The MSMQ built-in dispatcher will then automatically distribute messages between running Workers.
The easiest method of deploying Sencha Web Application Manager is to install all of the software on one machine. That said, Sencha Web Application Manager API Server and Sencha Web Application Manager Worker can be installed on different machines within your local network without limitation.
Sencha Web Application Manager Server runs on top of Windows Server 2012. In order to install Sencha Web Application Manager, your system must have specific roles and features enabled. Configuration changes will also need to be made to IIS and SQL Server. These steps are all covered below.
Sencha Web Application Manager API Server runs on IIS.
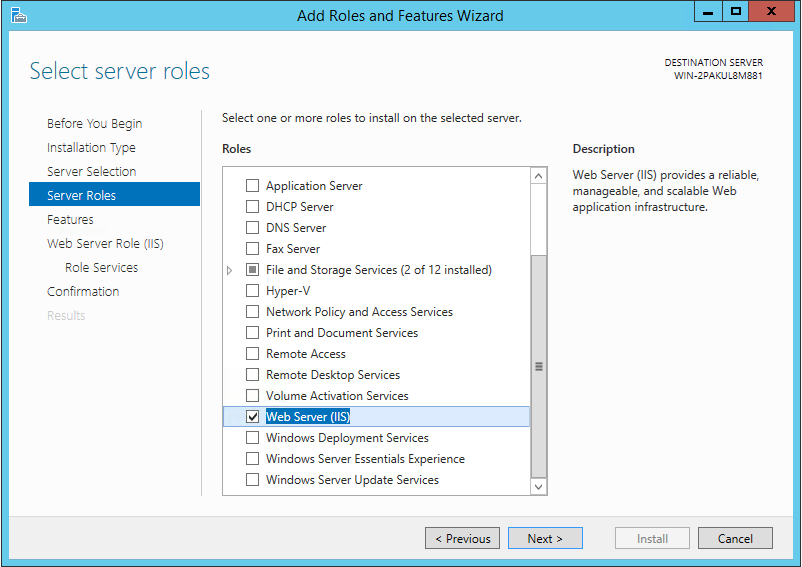
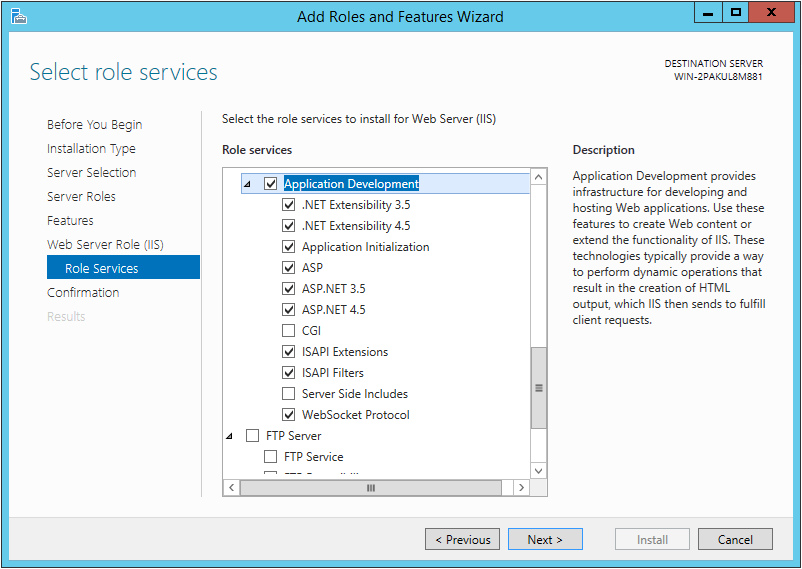
IIS should be installed with most Application Development options checked.
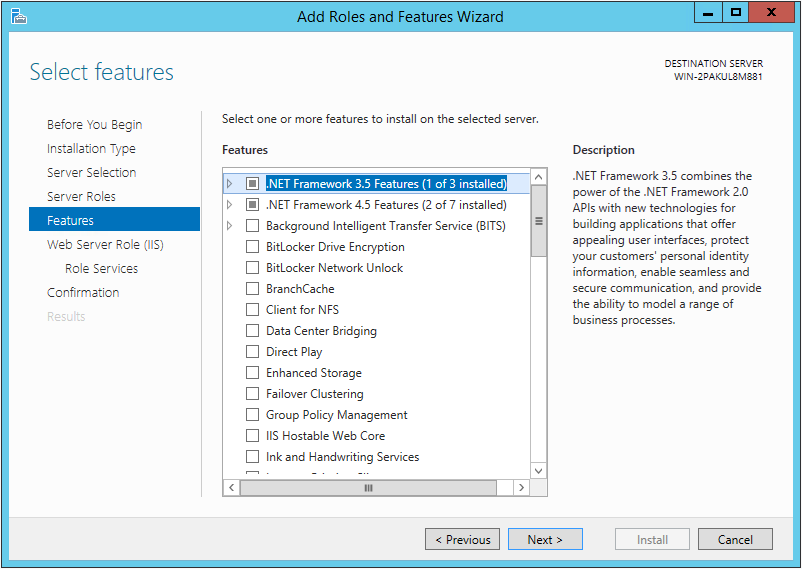
Sencha Web Application Manager API Server is built using the .NET Framework.
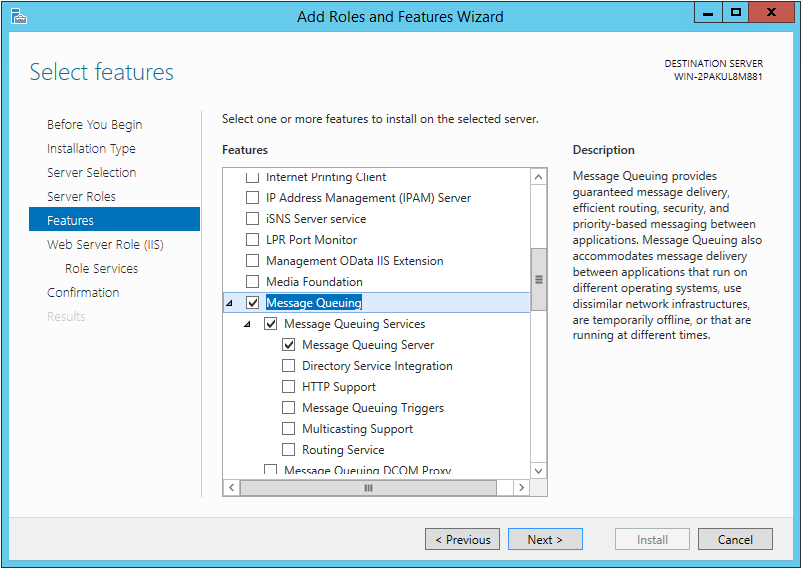
Sencha Web Application Manager uses Message Queuing (MSMQ) for distribution of tasks.
After installation of the required Roles and Features, you will need to make several configuration changes, covered below.
After IIS has been installed, Sencha Web Application Manager requires that local handlers and modules are unlocked.
This can be achieved by modifying IIS settings directly, or configuring via the command line:
    %windir%\system32\inetsrv\appcmd.exe unlock config -section:system.webServer/handlers

    %windir%\system32\inetsrv\appcmd.exe unlock config -section:system.webServer/modules
The above commands will need to be run through an elevated Command Prompt (run as an Administrator).
Sencha Web Application Manager utilizes Microsoft SQL Server for its primary data storage.
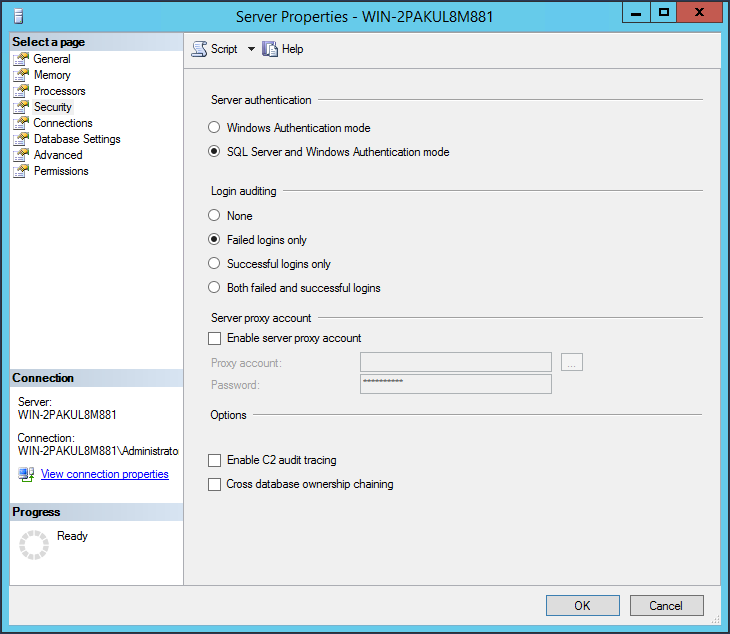
Ensure your instance of SQL Server is configured to allow both SQL Server and Windows Authentication modes.
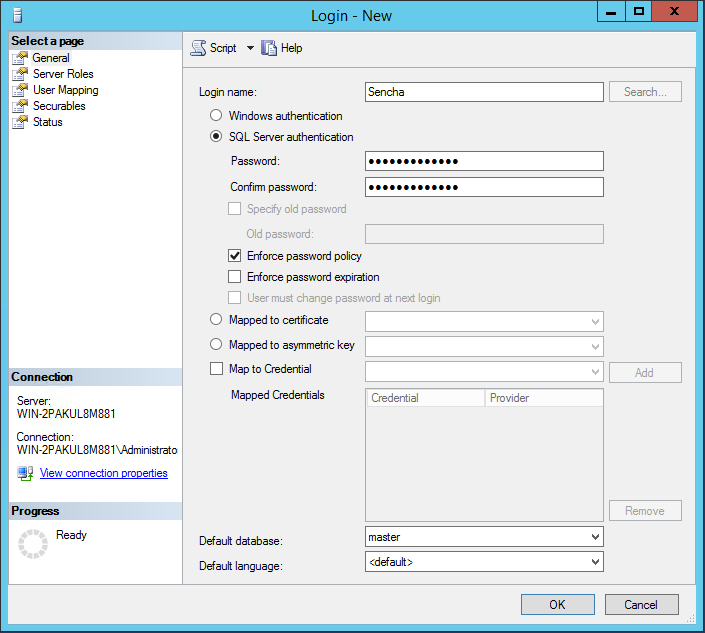
It is recommended to create a SQL user account specifically for Sencha Web Application Manager. Please note that
Enforce password expiration should not be checked against the new user, otherwise this will cause Sencha Web
Application Manager to fail upon expiration of the SQL user's password.
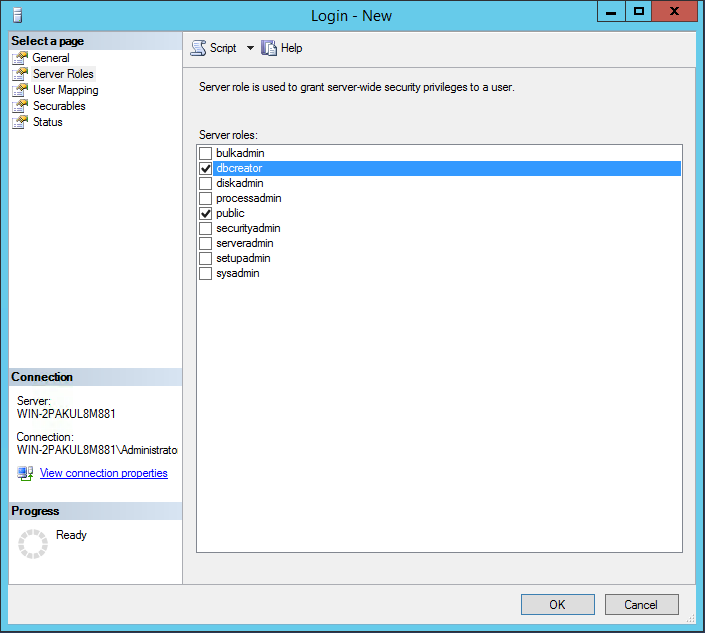
This SQL account needs to be granted a minimum server role of dbcreator, with a defined password that adheres to SQL
Server's password policy.
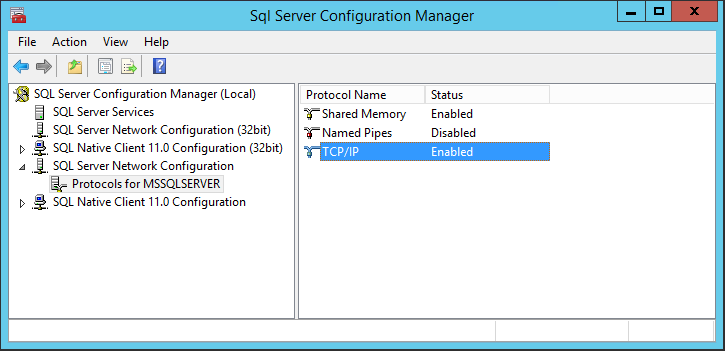
Lastly, you need to ensure that the TCP/IP protocol is enabled for SQL Server, and a port is specified. This can be done through the SQL Server Configuration Manager. You may need to restart the SQL Server service after making these changes.
After Message Queuing (MSMQ) has been installed, you need to create a MSMQ Private Transactional Queue. This will be used as a communication channel between the API Server and Worker.
Open Computer Management from Administrative Tools
Go to Services and Applications -> Message Queuing -> Private Queues
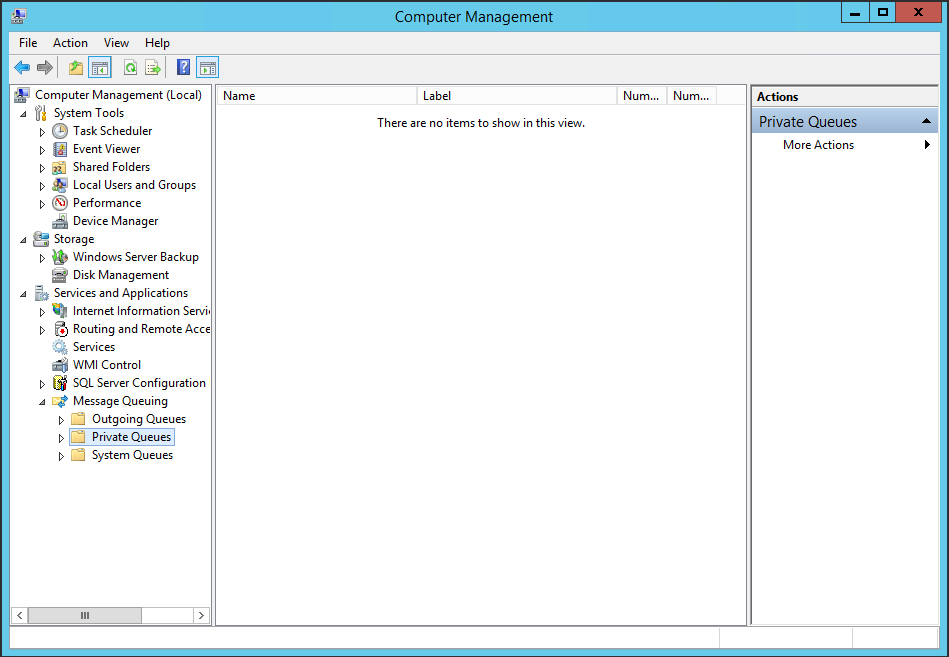
Sencha. Ensure the Transactional option
is checked.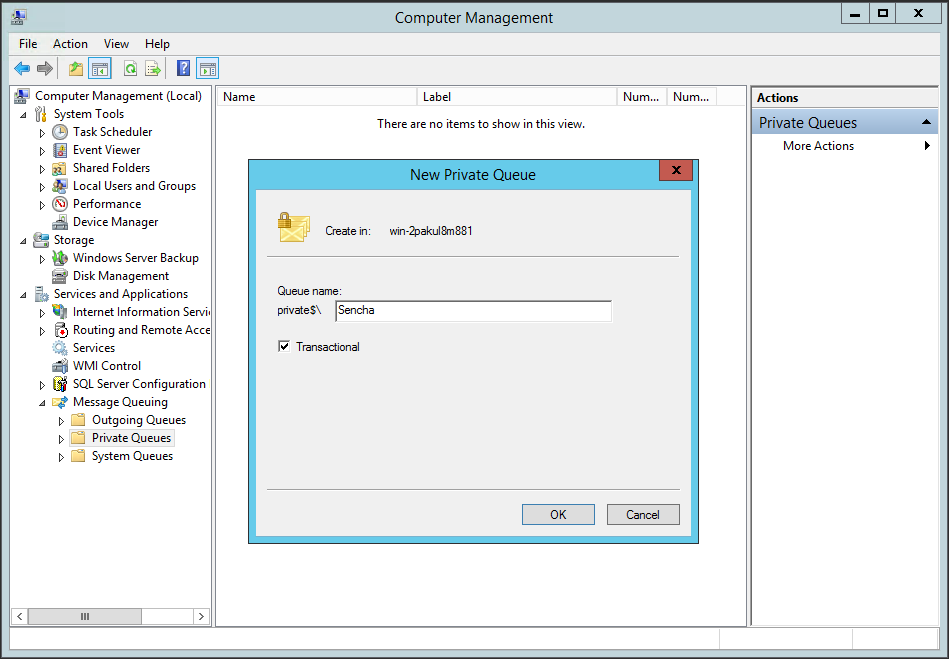
OK to add the new Private Queue.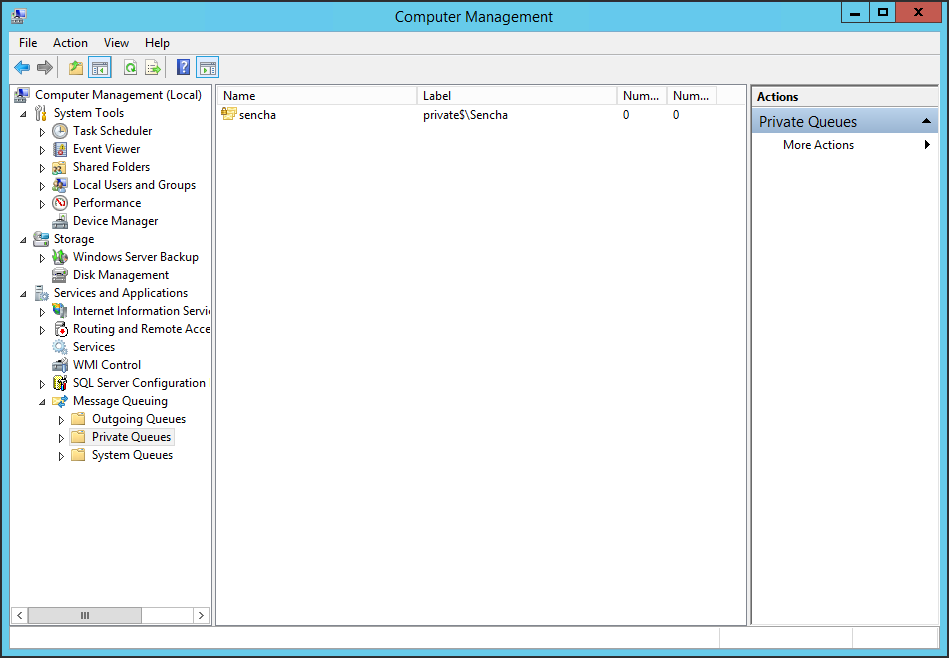
If the SQL Server instance is on a different machine than the Web Application Manager Server, you need to make some configuration changes to Distributed Transaction Coordinator (DTC) on the server hosting SQL Server.
Component Services from Administrative ToolsComputers -> My Computer -> Distributed Transaction CoordinatorLocal DTC, select Properties, and configure the Security settings to match the below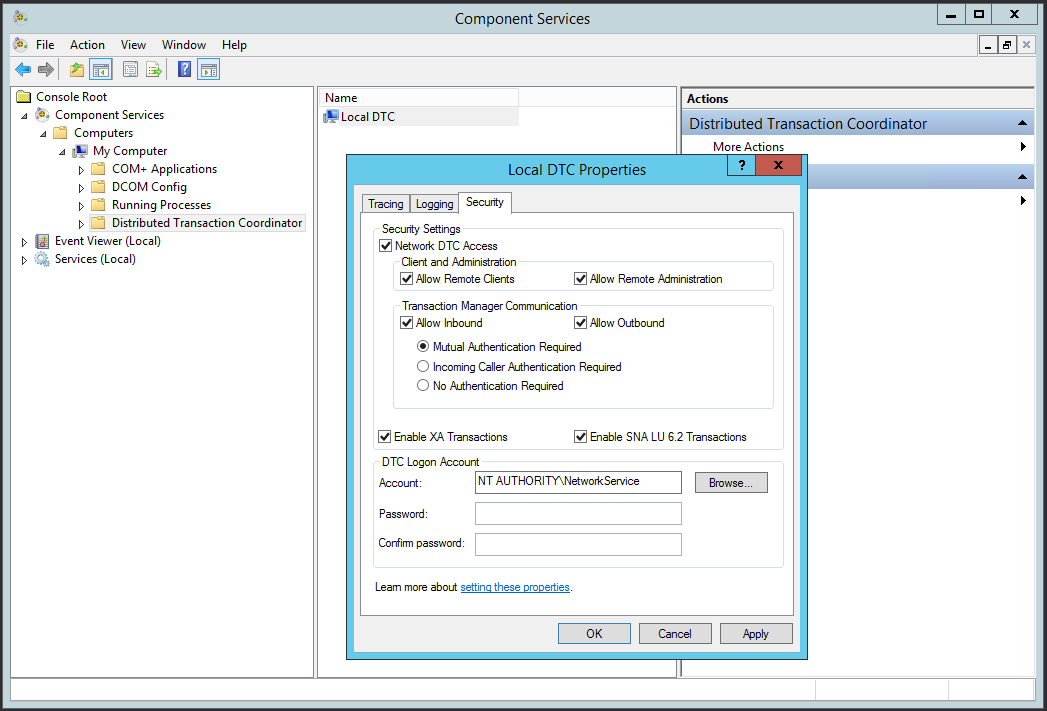
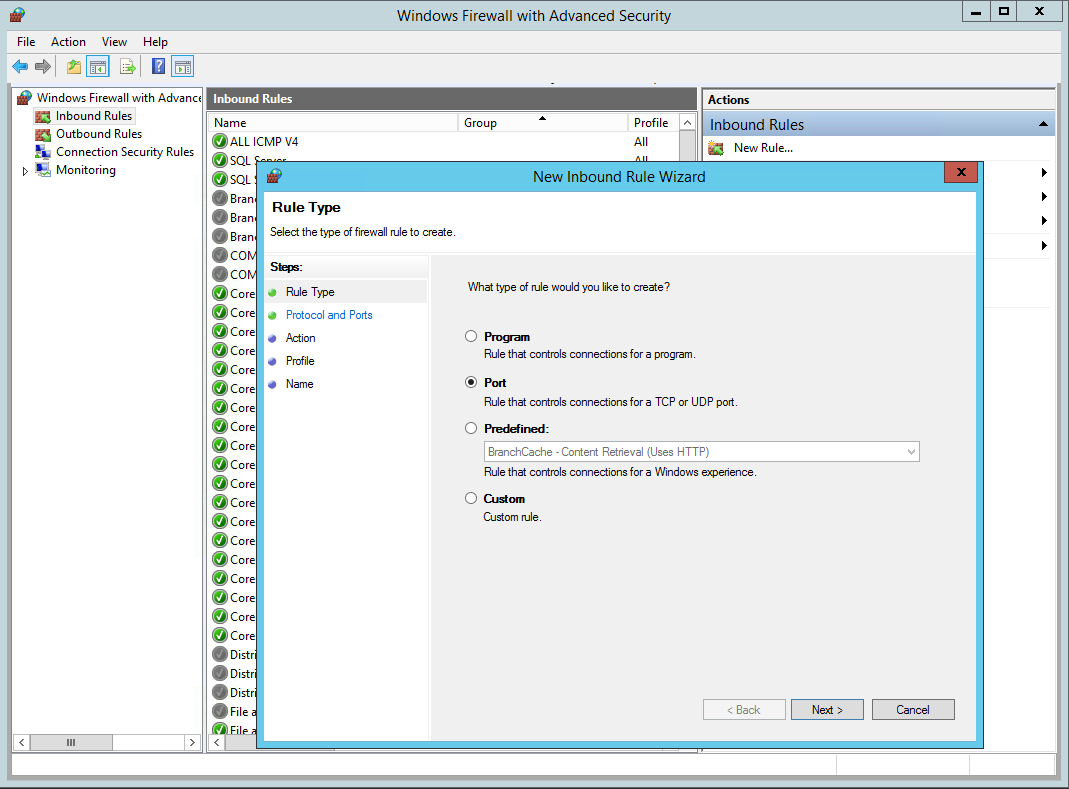
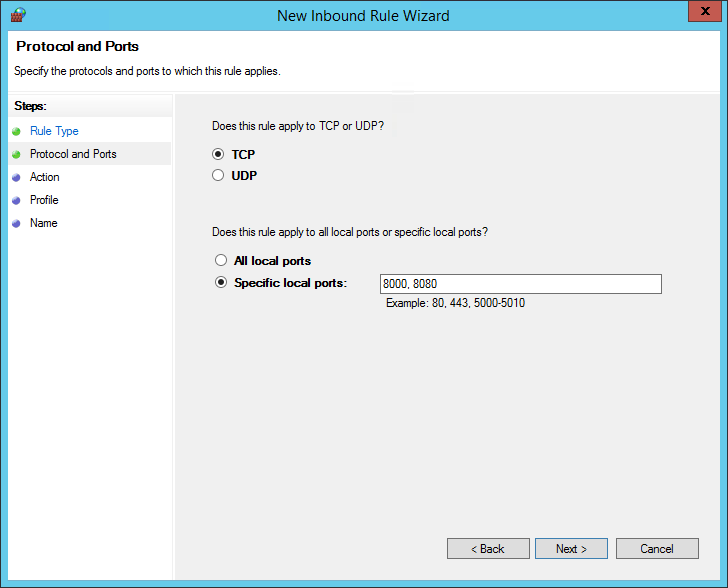
If Windows Firewall is enabled on the server, ports 8000 and 8080 both need to be open. This assumes that the Dashboard and API Server are being operated on those ports in your environment.
First, open Windows Firewall with Advanced Security from Administrative Tools, and add a new Inbound Rule,
selecting Port as the type of rule:
Specify a comma-separated list of port numbers that need to be opened on the Windows Firewall, for example 8000, 8080:
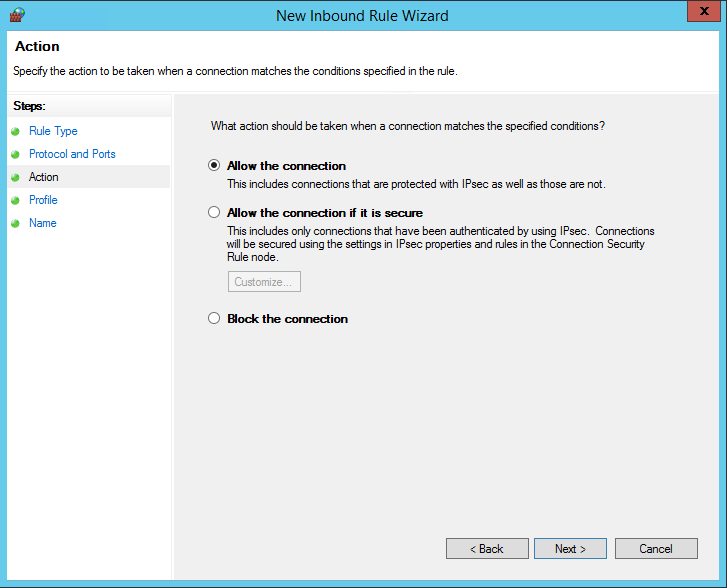
Allow the inbound connections on these ports:
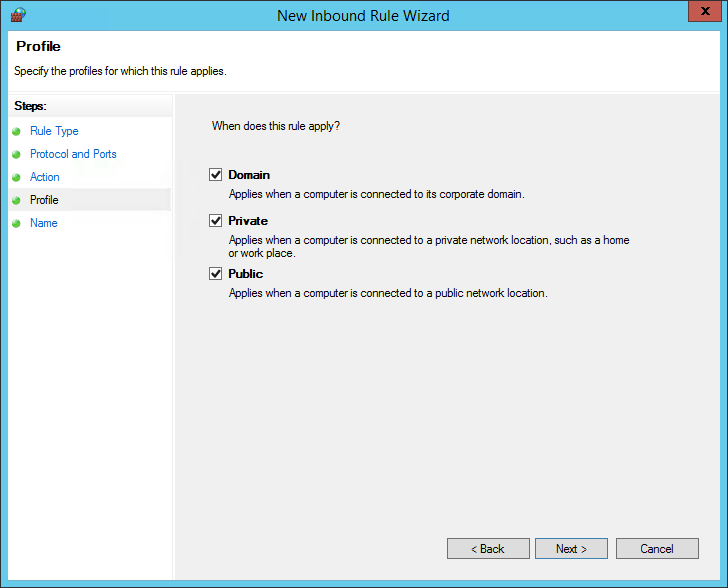
Select when this rule should apply (which types of network):
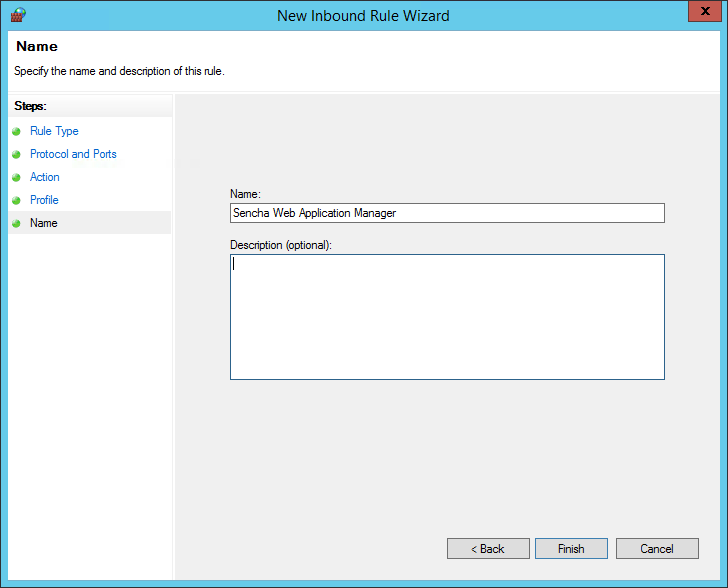
Finally, define a name for this new rule:
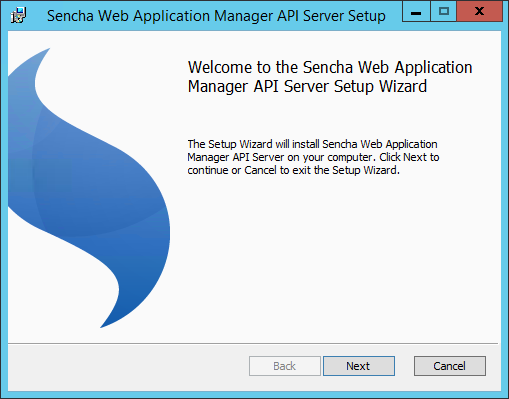
To start the Sencha Web Application Manager API Server installation, run
SenchaManagerApiServer_Setup.msi on the target machine.
Note: This should be the machine that was pre-configured as mentioned above (see "Pre-installation steps").
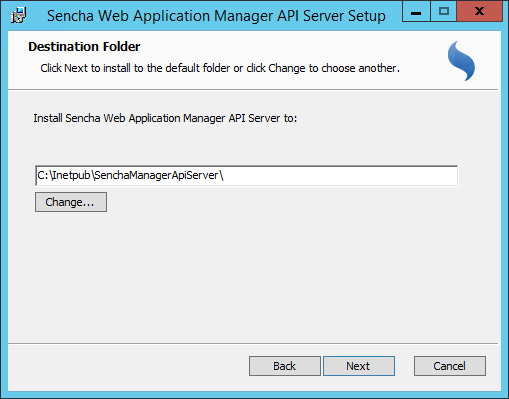
On the first step, you need to provide a file system path in which Sencha Web Application Manager API Server should be installed.
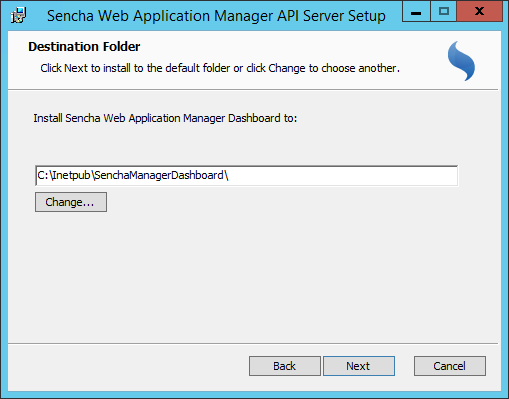
Then the same for Sencha Web Application Manager Dashboard.
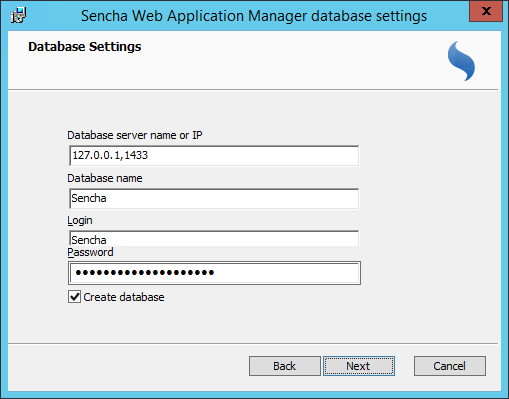
After that you need to specify database connection settings. If you want the installer to create your target database for you, check the "Create database" checkbox.
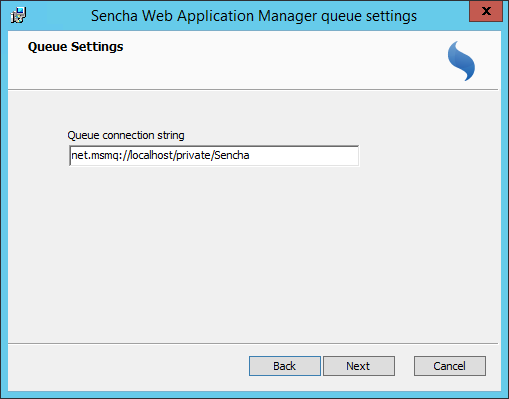
Next, provide the Messaging Queue connection string.
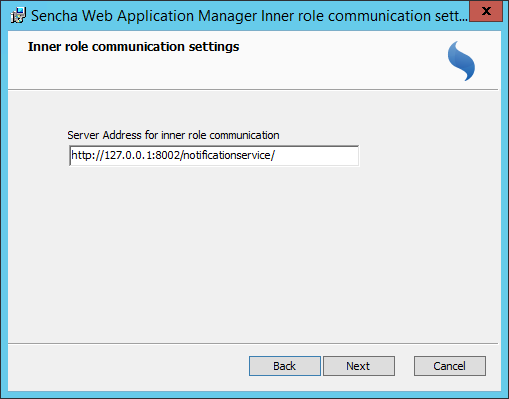
Then, the default server address for inner role communication is displayed. Alter this if needed.
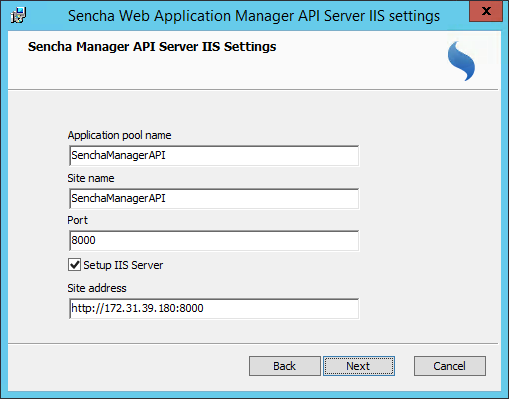
Input your IIS Server settings for Sencha Web Application Manager API Server.
Note: For the API Server URL, this is the URL that is to be reachable by end users, so this needs to either be an IP address or domain name based URL.
Finally, define settings for Sencha Web Application Manager Dashboard.
Note: For the Dashboard URL, this is the URL that is to be reachable by end users of the Dashboard, so this needs to either be an IP address or domain name based URL.
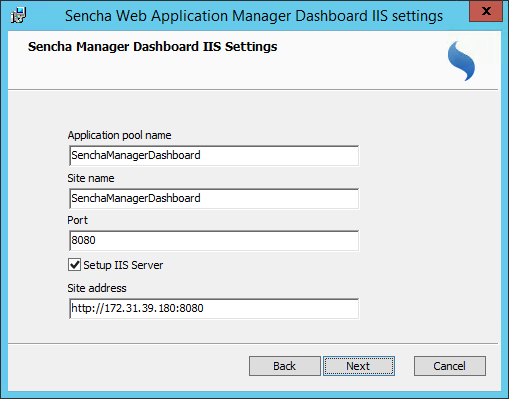
Click Install to carry out the installation using the provided settings.
After the Sencha Web Application Manager API Server is successfully installed, a web browser window will be displayed and you will be prompted to finalize the installation. Enter the Database you specified during installation and the installer will create your Sencha Web Application Manager Schema.
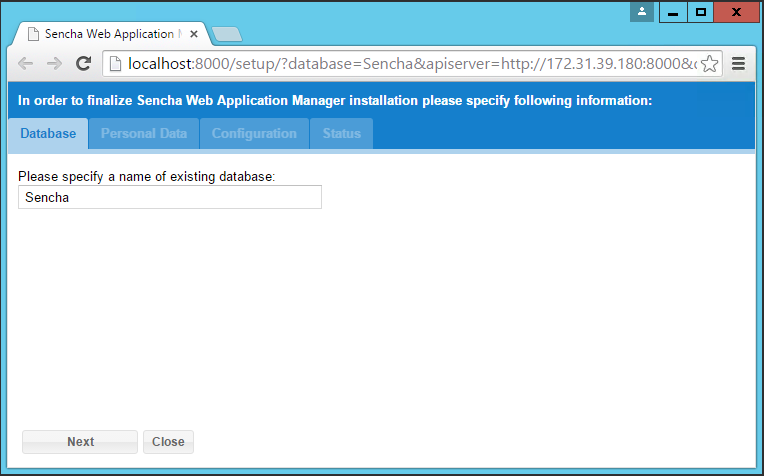
Next, you will need to define new credentials and define an Organization Code. This email address and associated password will be used for logging in to the Sencha Web Application Manager organization as an Administrator.
The Organization Code can simply be your company name, for example sencha, or a domain-like syntax such as
example.sencha.com.
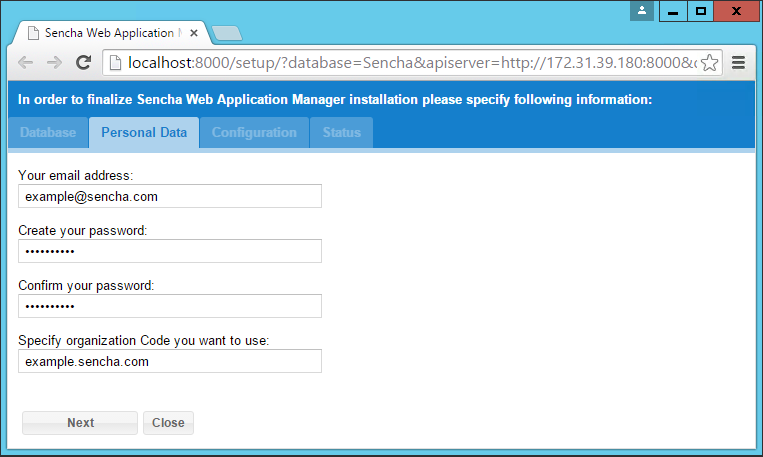
Finally, the installer will prompt you to define configuration settings.
For the API Server and Dashboard URLs, these are the URLs that need to be reachable by end users, so this needs to either be an IP address or domain name based URL, as shown below.
Sencha Web Application Manager requires a file storage path on the server, where report exports are created.
In this example, a folder was created under C:\Sencha\FileStorage\. The Local System account needs Write
permissions to this folder.
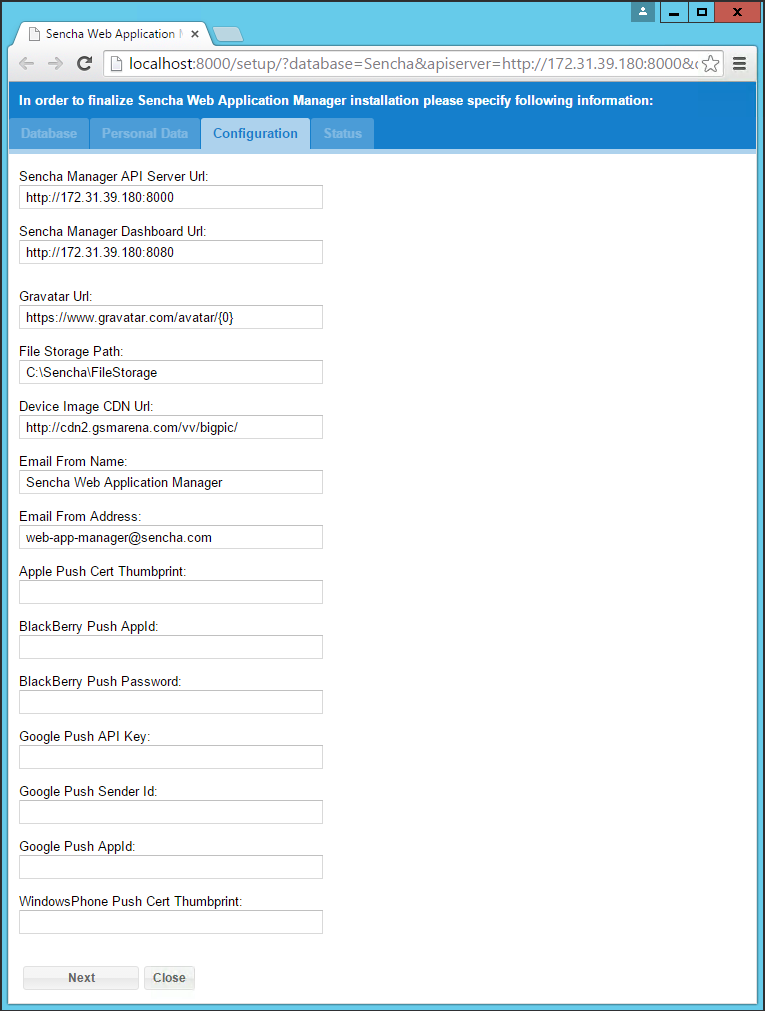
Click Next, and you should get a notification to say the process has completed successfully.
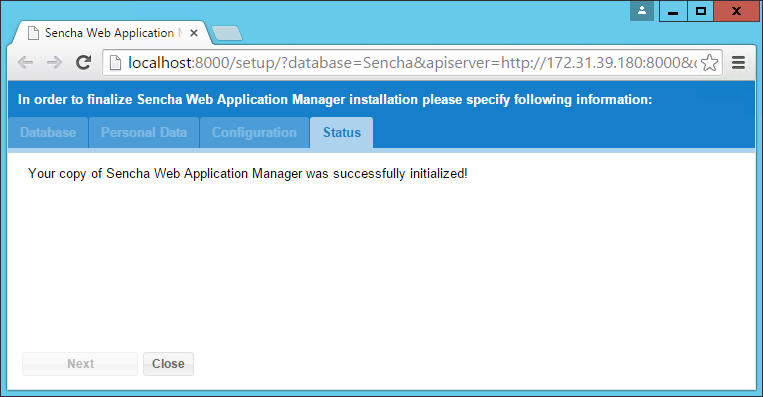
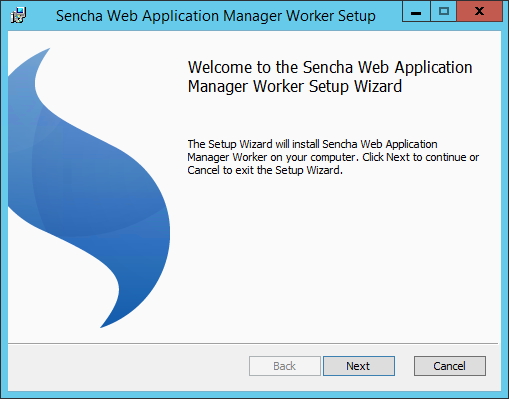
To begin installing Sencha Web Application Manager Worker, run
SenchaManagerWorker_Setup.msi on your target machine.
Note: This should be the machine that was pre-configured as mentioned above (see "Pre-installation tasks").
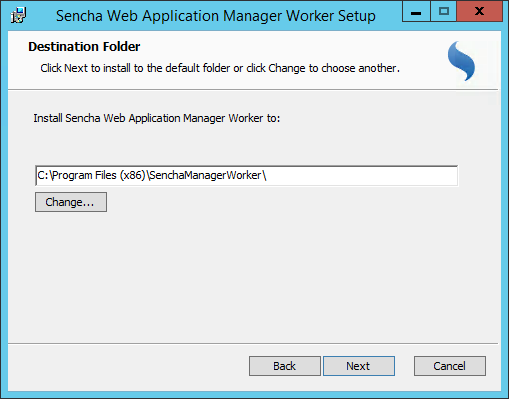
On the first step, you will need to provide a file system path in which Sencha Web Application Manager Worker should be installed.
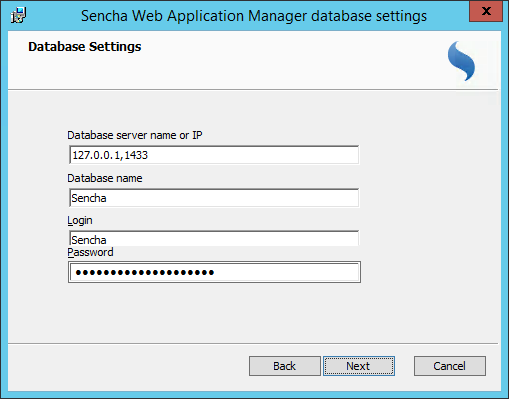
Next, specify your database connection settings.
On the next installation step you need to provide the installer with the Messaging Queue connection string.
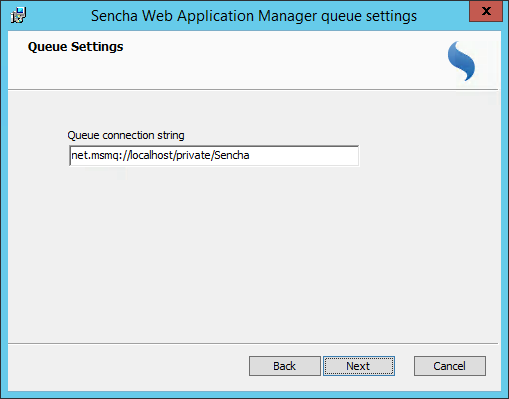
Finally, the installer prompts you to input your SMTP Server settings. Setting up Sencha Web Application Manager to use an SMTP server allows for the sending of notifications to end users when new accounts are added for them, or for password reset emails etc.
Please note that you only need to enable SSL if you are connecting to an SSL encrypted endpoint (usually port 465). If you are connecting to an SMTP endpoint that works through TLS (usually port 587), you don't need to enable SSL during the Worker installation.
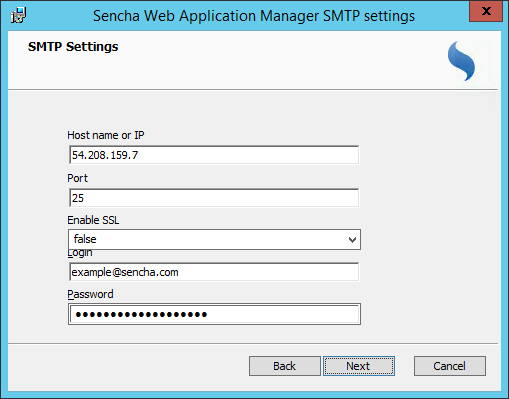
Click Install to carry out the installation using the provided settings.
This guide has walked through the process of setting up an on-premise instance of Sencha Web Application Manager.
There are some further configuration items that may be required for your on-premise installation. These are described in the sections below.
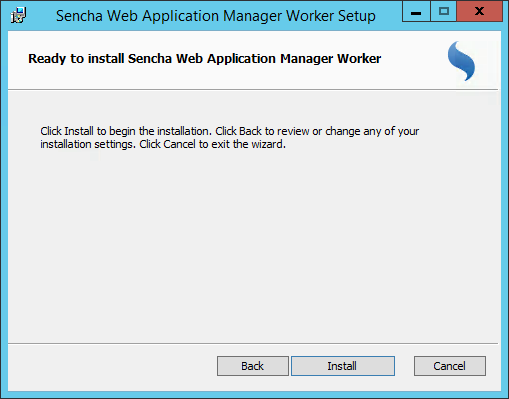
The MSMQ queue created earlier may need extra security permissions defined on it, to allow the Sencha Web Application Manager Worker Service to access messages in the queue.
By default, the Sencha Web Application Manager Worker Service runs under the Local System account, so view
the properties of the queue you created earlier, select the Security tab and grant Full Control permissions
to the SYSTEM user.
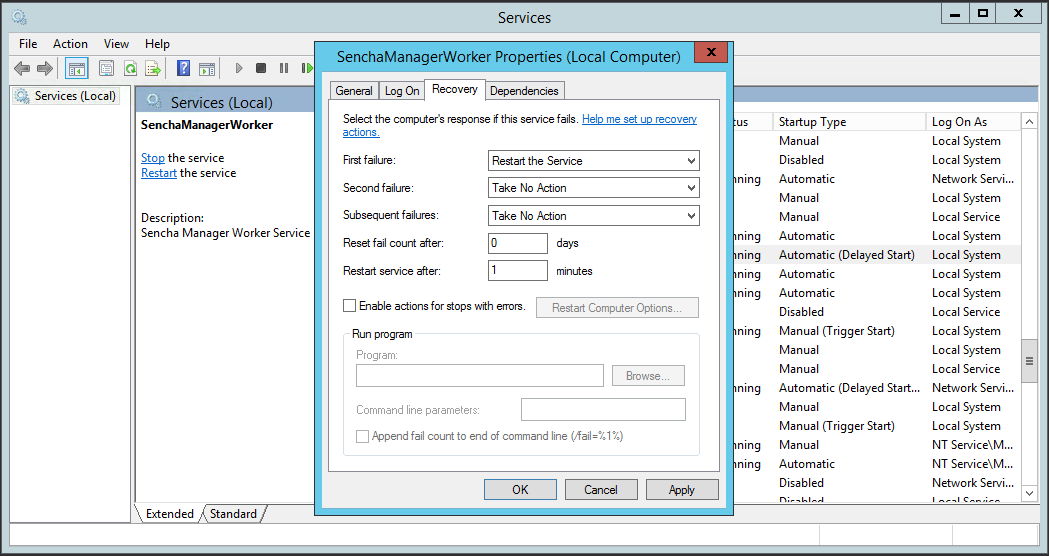
Sencha Web Application Manager Worker will be added as a Windows service. It is set to startup automatically, with a delay, which means it will start automatically after each restart of the server, but with a 2 minute delay (default on Windows Server). This helps to ensure all other services are available before the Worker service starts.
You may want to consider customizing the service recovery options, which can be done by double-clicking on the service
in the Services list, selecting the Recovery tab and customizing the applicable settings.
To assist in debugging and tracking of errors, the Sencha Web Application Manager Worker outputs logs to the
logs folder in the installation path.
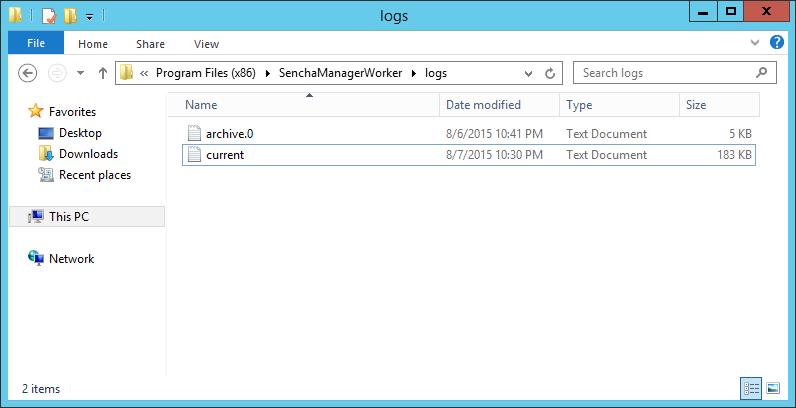
Logs are kept for 7 days, with logs from the current day always stored in the current.log file. Logs from
previous days are automatically archived in to other log files in the same folder, such as archive.0.log.
When rolling out a production instance of Sencha Web Application Manager, it is strongly recommended to set the API Server and Dashboard to communicate over an HTTPS connection, to ensure security of Web Application Manager data in transit between your network and a user's device.
This involves setting up IIS to use an SSL certificate, which can be configured within the Internet Information Services (IIS) Manager.
It is important to ensure the Sencha Web Application Manager database in SQL Server is backed up on a regular basis, to help mitigate data loss in the event of an unexpected server failure.
To test the installation and ensure everything works successfully, launch the Sencha Web Application Manager Dashboard
through the URL that was specified during the install process, for example http://ServerName:8080/.
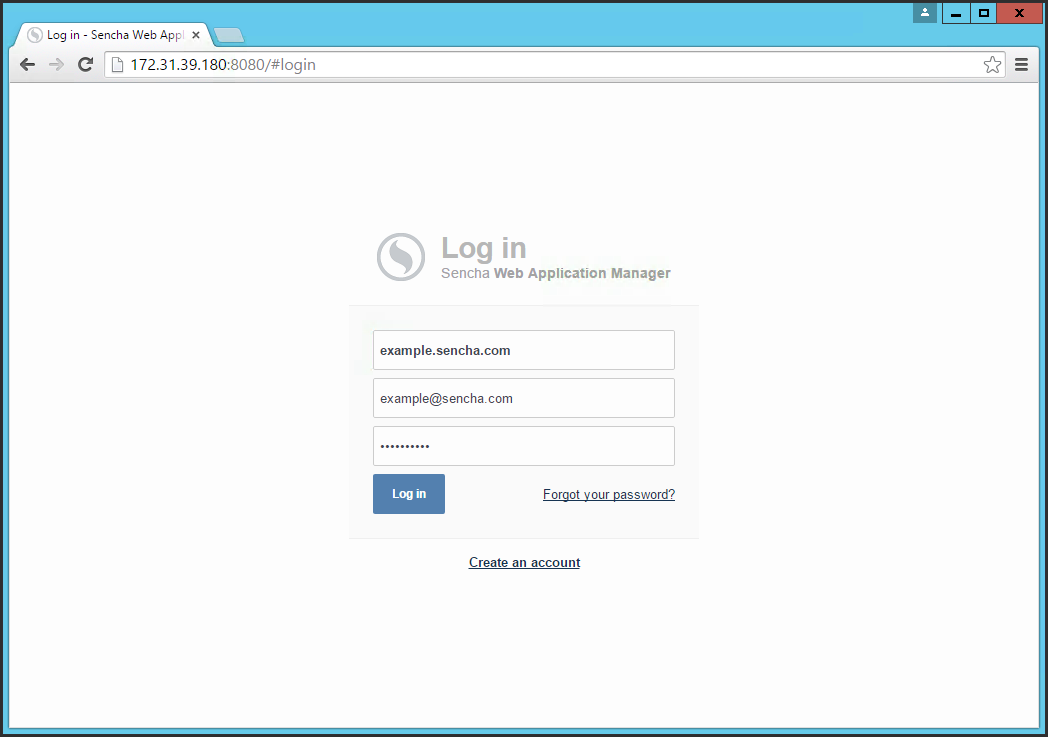
Login to the Sencha Web Application Manager Dashboard using the credentials specified during the install process.
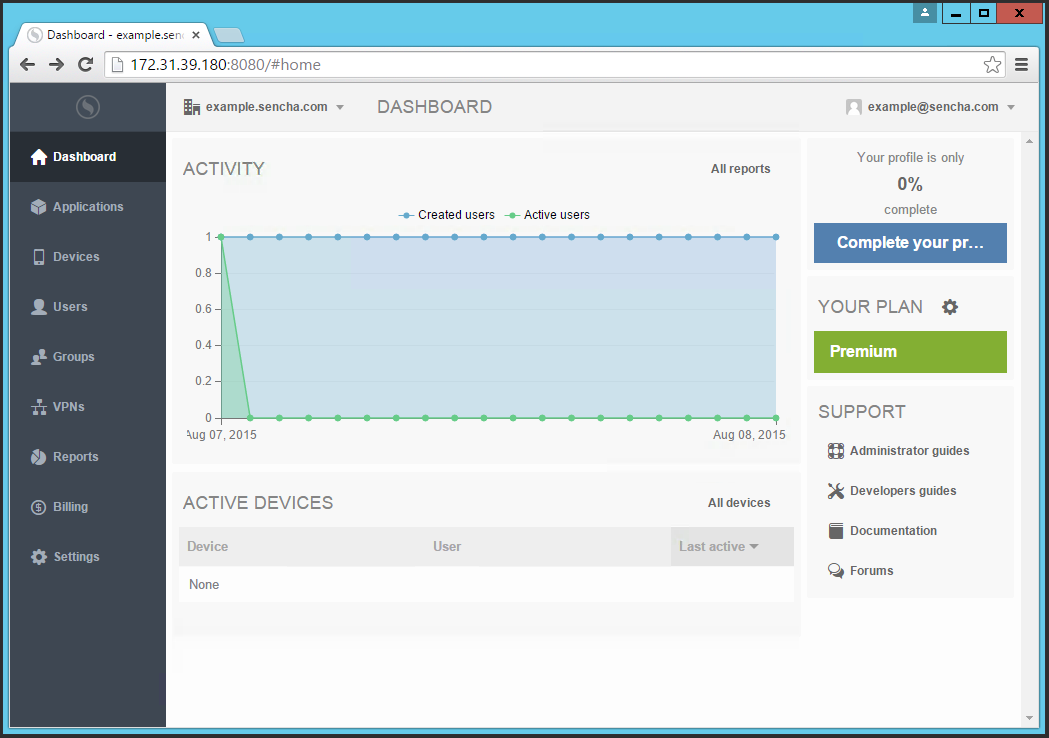
You should be able to login to the Dashboard and see an overview of your new Web Application Manager Organization.
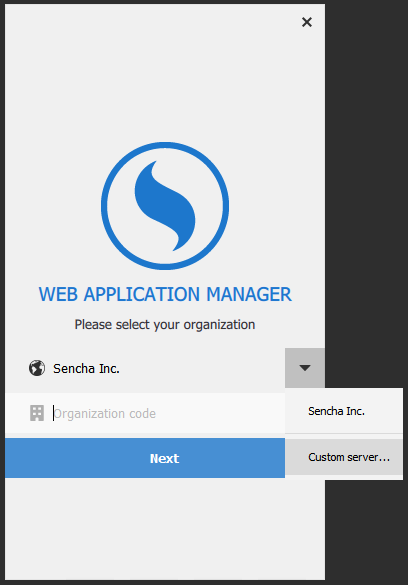
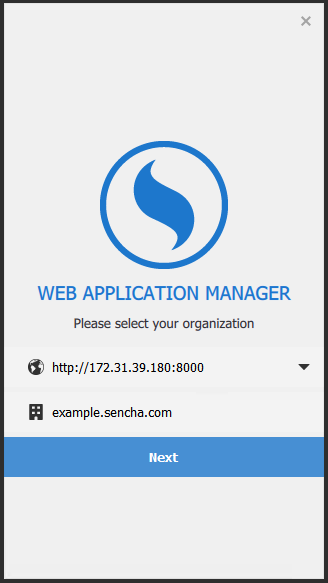
You can then get the Sencha Web Application Manager clients to access your on-premise environment by configuring it to use your custom server, instead of the Sencha-hosted environment. For example, on Windows desktop, the client allows you to select either the Sencha server, or provide your own custom server URL.
Enter your server's URL, along with the Organization Code.
Then finally, login using your credentials for that Organization.
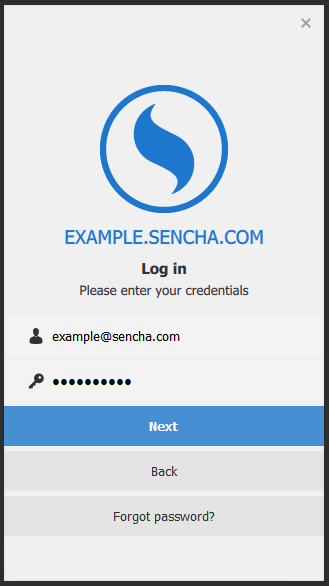
You should then be able to login and access your assigned applications.